Hello world. Welcome to the fifth Dev with Dave Game Progress Update. The biggest change in this update is the work done to the UI Handling system.
UI Framework
This is where the bulk of the work has been done for this update. Continuing off from where I left it last update, I have added functions to load in the UI data as well as to change the current UI Page.
I’ve got the Text and Images working 100% but I still need to add the functionality for the UI Buttons.
I’ve created three UI pages so far. One for the pre-game, in game, and the Game over screens. UI pages are stored in an Array, and contain data relating to all the elements on that page. This allows a simple function to change the page when required, by simply hiding all the old elements and showing the new ones.
Unfortunately a bug in the UI handling code caused a big delay in development this update.
Restarting the game
I also made a start on being able to restart the game. I’ve not managed to completely finish this yet so it’s not demonstrated in the video.
Basically this bit simply resets whichever variables and sprites are necessary for the game.
Refactoring
Now that the code has been developed a little more, I have also been busy tidying up some of the less neat code and refactoring where necessary.
This has mostly just been moving code to the correct scripts and making sure that the comments are still accurate.
In the next update
I’m hoping to get another zone type working for the next update, and perhaps the beginning of the powerup collection system. I’ll also get restart game bit working properly.
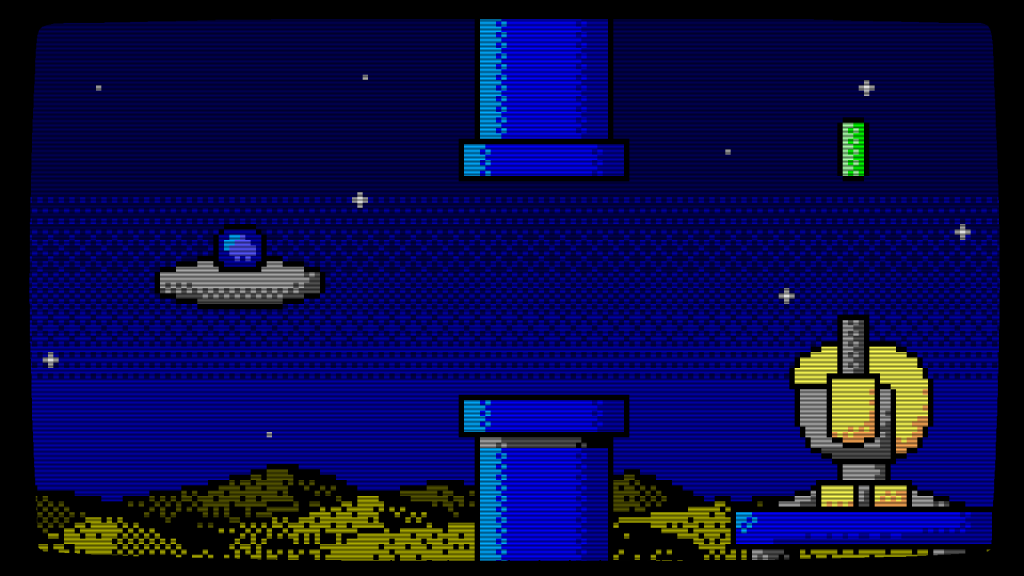
One of my favourite visual effects in Flappy-vaders is the CRT TV style border around the screen, making it look very similar to what I remember my ZX Spectrum looking like back when I was little.
Creating the border graphic was fairly straight forward using Paint.net, but implementing it in game was slightly trickier.
When I initially put the border in place, I simply resized it to fit the dimensions of the screen. Which works fine when working on a screen the same aspect as the original image, but when using screens of different aspects then distortion soon becomes apparent in the corners and edges of the image.
The easiest way I could think of to remedy this was to use a technique called Nine slice scaling ( or sometimes 9 Slicing, or Scale 9).
How it works
Nine slice scaling is a way of scaling 2D images proportionally, which helps maintain rounded corners, borders and the like.
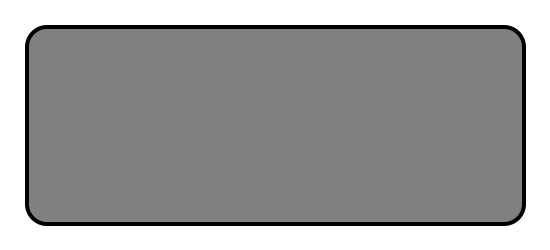
Normally Nine slice scaling is used for buttons or UI panels, where you would divide up a panel like the one below into 9 pieces, but it works just as well for the CRT TV outline shape as well.
Now, with the shape above, you can see that if you were to stretch it horizontally the corners would deform, becoming elongated horizontally, as would the borders on the left and right sides of the box.
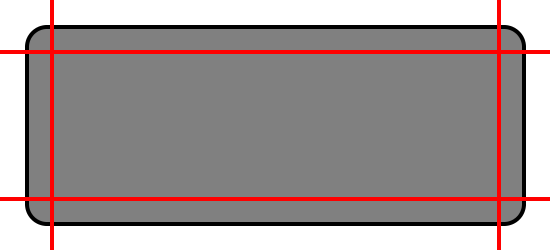
With the Nine slice scaling, you divide the box into 9 smaller sections. And resize them all individually. The corners remain the same size no matter what happens. The top and bottom edges can resize horizontally but not vertically, and the left and right edges are resized vertically but not horizontally. The middle section is resized both horizontally and vertically as this has no details which can be distorted.
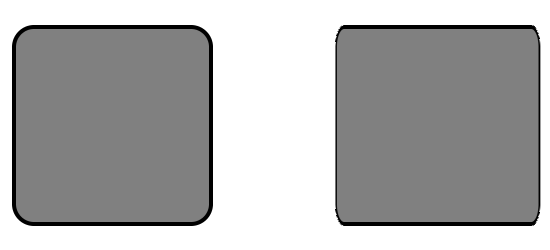
In the image above, the shape on the left has been resized using the nine slice scaling technique, the one on the right has just been resized to fit. You can see the difference in quality.
This technique means you can simply have 1 image for all the different sized buttons your UI needs, or for all your UI Panels etc.
Use in Flappy Vaders.
I decided to use 8 individual sprites, as I don’t want the big middle piece to be used for the border. This prevents the device from having to render a huge chunk of alpha transparency, which is never good for performance.
I also converted the original image into a texture atlas, so I could assign the sprites the correct section of image. Using texture atlases also speeds up render times because fewer draw calls are made.
Conclusion
And that’s all for now 🙂 I hope you found this blog informative.
Hello and welcome to the fourth Dev with Dave Game Progress Update. This update sees a little bit of refinement in the graphics, as well as the introduction of a couple of new systems.
UI Framework
First, I’ve started fleshing out a UI Manager script to help make setting up and updating the UI elements of the game a little easier. Although this is currently only behind the scenes stuff at the minute.
I’ve created a typed array to store data for all three element types (Text, Image and Button) which I’ll be using for the UI, as well as an array to manage which elements are shown on each page.
Coins
The next new addition is coins! The player can now collect coins when they appear on screen. They are spawned by the existing zone handling system, and the only changes I made were adding a couple of variables to the player type to store the total coins collected, as well as the coins collected from the current game, and adding a quick check in the collision handling function to see if the sprite hit is collectable or not.
Graphics
The eagle eyed among you will have noticed that the game looks a lot more like the concept pictures now. I’ve spent a good few hours using paint.net to create some graphics which are a little closer to what I intend the game to look like, rather than those awful placeholders it was using previously.
I’ve also added the scanlines and CRT overlays for the authentic retro look.
In the next update
The next job will be to replace the current Game over screen, and create a pre-game UI screen with a play button as well. I think it would be a good idea to add a UI card or two to the Trello to help keep track of progress.
I’ll also be doing more graphics work, creating sprites for the forthcoming zones, and perhaps adding further tweaks to the existing stuff.
Welcome to the first of the blog posts relating to our second P in the list, Programming!
Comments
Today I’m going to be talking about commenting code. Something I was first introduced to back in the 80’s with the Rem command on my ZX Spectrum. My commenting back then though was limited to a small asterisked box at the top containing the name of the project and my name, and then the occasional comment at the top of a section labelling it as the “movement bit” or the “game over bit”.
Now as with GDD’s there are those out there who advocate for commentless code, saying that if the code is well written that comments are un-necessary. And while this is perhaps true to a degree, I find it quicker to read a commented description of what a function does rather than having to read through the code to discover it.
That being said, comments can sometimes be used to explain bad code rather than rewriting the bad code into something better. Which isn’t an ideal practice.
And even worse are bad comments. I’m guilty of writing some of these myself, especially late at night after a beer or two. I’m sure you’ve all seen comments like “This is the bit that does the thing”. Comments like this are a complete waste of time and definitely should be avoided.
Writing useful comments
I find comments to be exceedingly helpful, especially when I’m returning to a project which I haven’t touched for a while. When you’re working in a team comments can easily inform a team member what code does, or how.
So, how to write good comments? The first piece of advice I can give you is to make your comments clear and concise. Don’t assume the person reading the comments has any idea of how the code works so please avoid using ambiguous terms in them.
Try to keep comments brief. Apart from a comment block at the start of a script file which can be any length really without disrupting someone trying to read the code. Even for a function description there is no real reason to use more than two or three lines of comments.
When it comes to commenting source files, I always try and include a header comment block which gives details like what project it’s from, what the file contains, and in the case of the main source file, a revision history. As I said earlier, it doesn’t matter so much about the length of this first comment block as it doesn’t interfere too much with reading the code. But obviously don’t write the comment equivalent of Tolstoy’s War and Peace.
Another thing I find really helpful to comment is variables. I usually leave a single line comment above the variable declaration describing what the variable keeps track of, I find this combined with a fairly clear variable works well.
//	Sets the players initial velocity
player.yVelocity#=0.0
I also add a comment block to the top of every function definition. This contains the usage details of the function, as well as a couple of lines of description.
//********************************************************************************
//	null = UpdateZones( speed# as float)
//********************************************************************************
//	This function updates the positions of the zone sprites and maintains the
//	distance variable
//********************************************************************************
As for the rest of my code, I certainly don’t comment every line as some code is so obvious that it’s not necessary. Instead I add a title comment at the start of a particular bit of code, be it in a loop, or a function, or wherever, and then a comment which breaks down what the next few lines are doing.
//	Creates the sprite and sets the properties
bgLayers[layerID].spriteID[0]=CreateSprite(imgID)
SetSpritePosition(bgLayers[layerID].spriteID[0] , 0 , 0)
SetSpriteSize(bgLayers[layerID].spriteID[0] , width# , height#)
Practice makes perfect
When it comes to commenting, there is no better way to get experience than actually writing some. Just remember to keep them concise and useful. There is no better feeling than returning to some code after a break and be able to just pick it up where you left off thanks to the brilliant comments you’d left 🙂
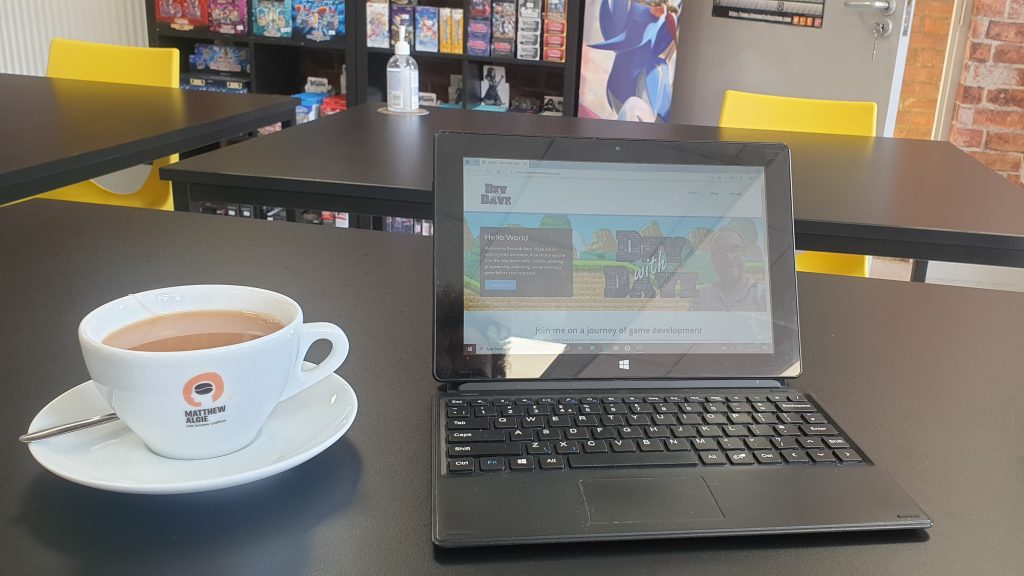
I went to the Top-Deck Inn on Monday this week. It was the first time I’ve been anywhere with the tablet since before the UK went into lockdown back in March (I think anyway, feels like it was forever ago now).
It was really nice to sit and enjoy a reasonably priced cup of tea while I worked on Flappy-vaders.
I also managed to squash a bug relating to the explosion effect, despite only being there for an hour.
What’s coming next..
So, over the next couple of months I’m going to be talking about programming. On top of the rundown of the progress made on the game in the fortnightly updates, I’m going to share some thoughts on things which will help to make you a better developer.
We’ll be starting off later this week with comments, and how important it is to comment your code.
Outro..
And that’s all for now. I’m off to fire up the tablet and write some more Flappy-vaders (While I listen to Ernest Cline’s awesome second novel “Armada”)
Click the button above to see the revised GDD for Flappy-vaders.
The modifications this time round are mostly oversights which got missed off the first time round. One which I hadn’t thought of, and one which I simply forgot to include (D’oh!)
For those interested, the modified/addition sections are as follows.
3.5 Player Death
The game ends when the player dies.
The player will die if the player character collides with any of the obstacles or enemy or gets shot down.
The player will also die if the ships y position gets too low on the screen.
3.7 Daily Bonus
To encourage player retention the game should include a daily bonus system. The more days played consecutively, the larger the reward.
Rewards can be either in game currency or powerups.
Powerup rewards cost in the store determines there value here.
The actual type/style of the daily bonus will be determined later.
Hello and welcome to the third Dev with Dave Game Progress Update. I’ve been busy building on the prototype systems which had been developed previously.
Zones
I have added a second subset of zone data to better demonstrate the random selection of zone subsets. I also included a length value into the zone data so that zones can vary in length and still flow seamlessly from one to the next.
Player Death
Adding the hitboxes to the sprites was fairly simple in AGK, as was checking the collisions. I opted for the more complex polygon shape (Polygon will create a close fitting convex polygon around the visible pixels of a sprite) as I am only checking for collisions with a handful of sprites and it will mean more exact collision detection.
I also added a simple particle based explosion to the player ship which plays when there is a collision. The image used for the particles is one taken from an asset pack I purchased years ago and is simply a placeholder again for the time being.
Game States
Another system I’ve added as a prototype in this update is a system for handling game states which was necessary to allow the transition from Playing the game to the player crashing and the game over message being shown.
This system works by having two variables to track the GameMode (Things like Initialisation, Showing Menu, Playing Game, etc) and Loop Mode (Which breaks the game mode down into sections, e.g. Pre-Game, Game, Post-Game stuff). This way I simply have to update a variable to switch from running one bit of code, to the next.
User Interface
I have added a script for the UI stuff, and added a simple text only Game over message to display when the player has crashed.
I’ll be developing the UI further at a later point in development.
GDD Updates
There are a few changes which need making to the GDD this week.
I had omitted the fact the the player dies if they crash into the bottom of the screen (in section 3.5 Player Death), and there are a couple of new additions as well.
I’ll try and make these changes over the weekend and get the revised Flappy-vaders GDD uploaded on Monday.
In the next update
And thats all for this time. Over the next two weeks I will be carrying on with getting some more prototype systems in place for the other zones.
I will also spend some time creating graphics to replace the placeholders that I am using currently.
The last thing I need to cover with regards to planning, is the how/why behind the idea of “Flappy-vaders”. Starting next week, the topic of conversation will be shifting to Programming.
In this post I’ll talk a little about the thought process behind the idea of Flappy-vaders.
Genre
The two biggest constraints for Flappy-vaders were time, and that I’d be writing it using a ridiculously low spec PC. Due to these factors I had already decided to create a simple casual style mobile game.
Again, for the sake of development time, I decided to take some already successful concepts from other games and combine them in a (fairly) unique way.
I decided to take the game mechanic from “Flappybird”, as it’s fairly simple, as well as being quite well known and fun/addictive to play.
I also decided to expand on this idea by adding elements from other games, such as the “zones” which you see in games like Jet Pack Joyride etc.
Now don’t get me wrong, I’m not simply copying Flappybird. This is going to be an original game in it’s own right, and I am 100% not encouraging people to create the utterly rubbish “asset flip” style games which are nothing more than a simple online tutorial which has been followed and the graphics replaced.
Visual Style
One of the things which makes games stand out at the store and in videos online is the visual style. I’d already decided to create a 2D game due to the hardware. I can’t imagine how the Linx tablet would run Blender, lol!
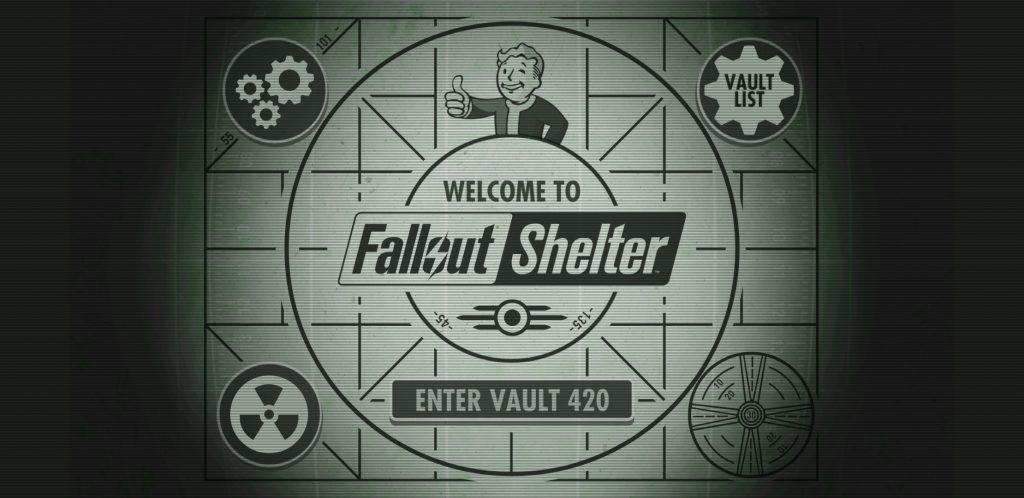
My initial inspiration for the graphical theme of Flappy-vaders was the menu screen for Fallout Shelter by Bethesda.
I loved the old style scan lines and the darkened edges of the screen, reminiscent of old CRT TVs. I imagined I could produce an effect similar to that of an 80’s era TV with a border and a scanlines overlay.
My next thought was about the type of games I’d have been playing on such a TV. Now in the 80s I had a ZX Spectrum, which had only 8 colours (well, 16 if you count brightness). I thought that palette would be a bit limiting, so I looked at other similar age devices before settling on the Sega Master System.
The Sega Master System has 256 available colours which should be more suitable for this project.
Monetisation
The last thing to do was decide on how the game will be monetised. Since it will be a casual mobile game, it will be free to download but include adverts. The player will be able to remove the ads by paying a small one off fee.
Another popular way of monetising mobile games is through the purchase of in game currency. This can be used to buy power-ups and upgrade the ship. Since I was planning on having power-ups and upgrades in the game, this seemed like a logical strategy to follow.
Conclusion
Overall it took me about a fortnight of thinking, researching and jotting down ideas. And then maybe as long again to refine them and be ready to create the GDD.