Introduction
One of my favourite visual effects in Flappy-vaders is the CRT TV style border around the screen, making it look very similar to what I remember my ZX Spectrum looking like back when I was little.
Creating the border graphic was fairly straight forward using Paint.net, but implementing it in game was slightly trickier.
When I initially put the border in place, I simply resized it to fit the dimensions of the screen. Which works fine when working on a screen the same aspect as the original image, but when using screens of different aspects then distortion soon becomes apparent in the corners and edges of the image.
The easiest way I could think of to remedy this was to use a technique called Nine slice scaling ( or sometimes 9 Slicing, or Scale 9).
How it works
Nine slice scaling is a way of scaling 2D images proportionally, which helps maintain rounded corners, borders and the like.
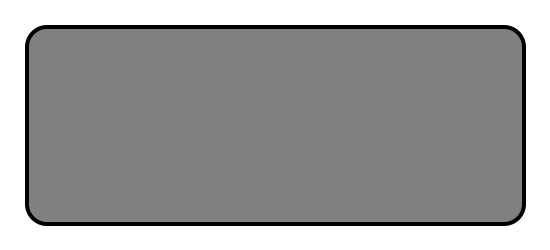
Normally Nine slice scaling is used for buttons or UI panels, where you would divide up a panel like the one below into 9 pieces, but it works just as well for the CRT TV outline shape as well.
Now, with the shape above, you can see that if you were to stretch it horizontally the corners would deform, becoming elongated horizontally, as would the borders on the left and right sides of the box.
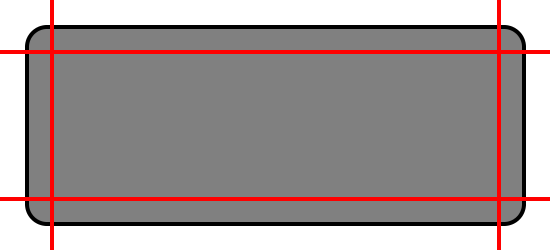
With the Nine slice scaling, you divide the box into 9 smaller sections. And resize them all individually. The corners remain the same size no matter what happens. The top and bottom edges can resize horizontally but not vertically, and the left and right edges are resized vertically but not horizontally. The middle section is resized both horizontally and vertically as this has no details which can be distorted.
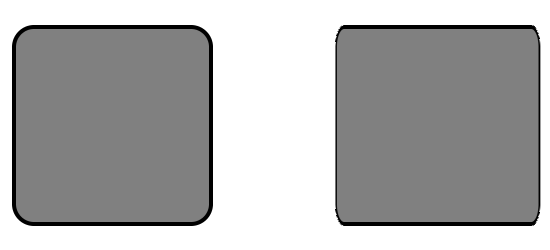
In the image above, the shape on the left has been resized using the nine slice scaling technique, the one on the right has just been resized to fit. You can see the difference in quality.
This technique means you can simply have 1 image for all the different sized buttons your UI needs, or for all your UI Panels etc.
Use in Flappy Vaders.
I decided to use 8 individual sprites, as I don’t want the big middle piece to be used for the border. This prevents the device from having to render a huge chunk of alpha transparency, which is never good for performance.
I also converted the original image into a texture atlas, so I could assign the sprites the correct section of image. Using texture atlases also speeds up render times because fewer draw calls are made.
Conclusion
And that’s all for now 🙂 I hope you found this blog informative.