How to record video of your game
I was sat browsing through some game development groups on Facebook the other day (as I often do, lol), when I noticed that a friend of mine had shared a video of the game he was working on. I couldn’t help but notice that the video had been recorded using a mobile phone held in one hand whilst playing the game with the other. As you can imagine the video was shaky and really didn’t do justice to the game, so I’m writing this guide not only to help my buddy, but for anyone else out there who wants to record video of your game for free and with brilliant results.
There are several ways to record video of your game from a PC. Depending on your operating system, both Windows and Mac have built in ways to record the screen with a few keyboard shortcuts. There are also several programs, both free and paid for, available for all platforms. In this tutorial I will be showing you how to capture video and sound using OBS (Open Broadcaster Software) which is available for free from https://obsproject.com/
Configure OBS
Once you have downloaded and installed OBS, and run the Auto configure wizard, then it’s time to get started configuring OBS to record game play from your game.

In the Scenes panel, press the + icon in the bottom left hand panel to create a “scene”. The scene can contain specific video and audio inputs, allowing you to switch between them whenever you want. However to record video from your game we only need the one scene.
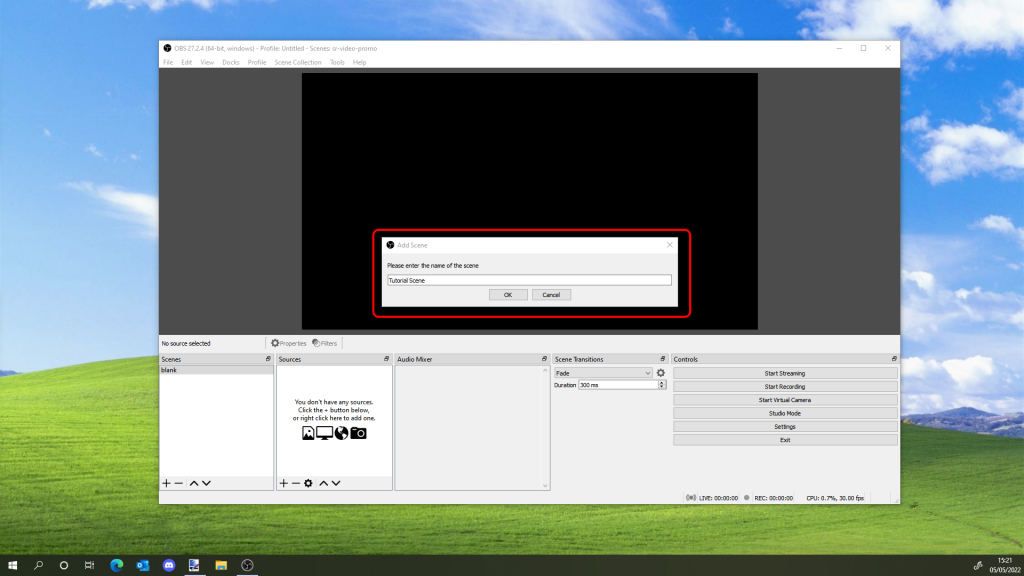
Enter a name for your scene in the dialogue, and press ok. Your new scene should appear in the list in the scenes panel. You can switch between scenes by clicking on their name.
Next comes adding the video and audio sources to the scene.
Add a video source
Locate the sources panel, which is usually next to the scenes panel in the bottom left of the screen. Then press the + icon to bring up the list of available sources.
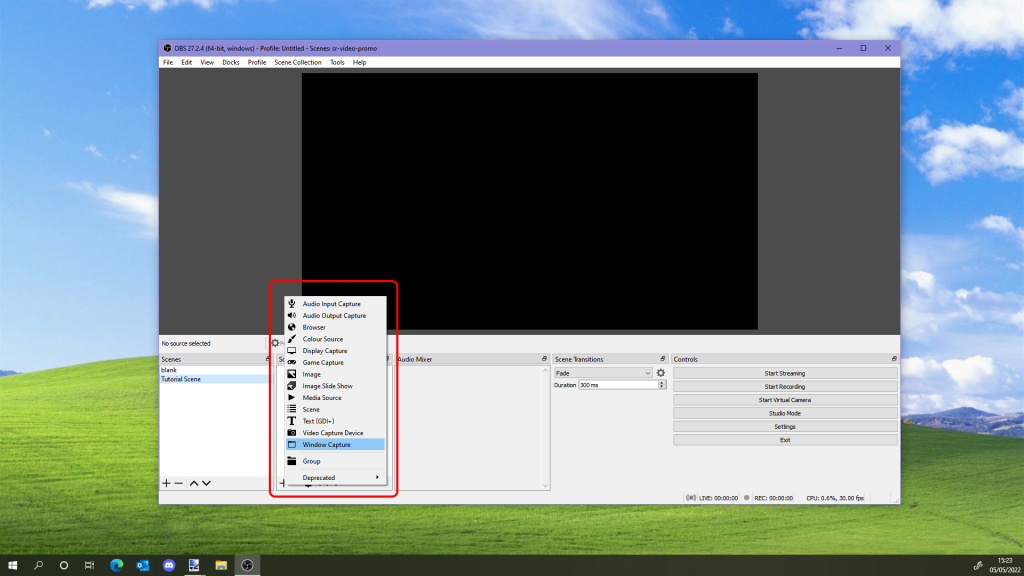
Now depending on how your game works, you have a choice to make here. For Flappy-vaders, which runs in windowed mode, I selected Window Capture from the menu. But if your game runs full screen and not in a window, then the Display Capture is the one that you will want to select.
If you do choose Display Capture then please be aware that the next paragraph or two might be slightly different for you.
Select Create New from the next dialogue and give your source a name before pressing ok and moving on to the next bit. I simply called it Window Capture, but you can call it whatever is most helpful to you.
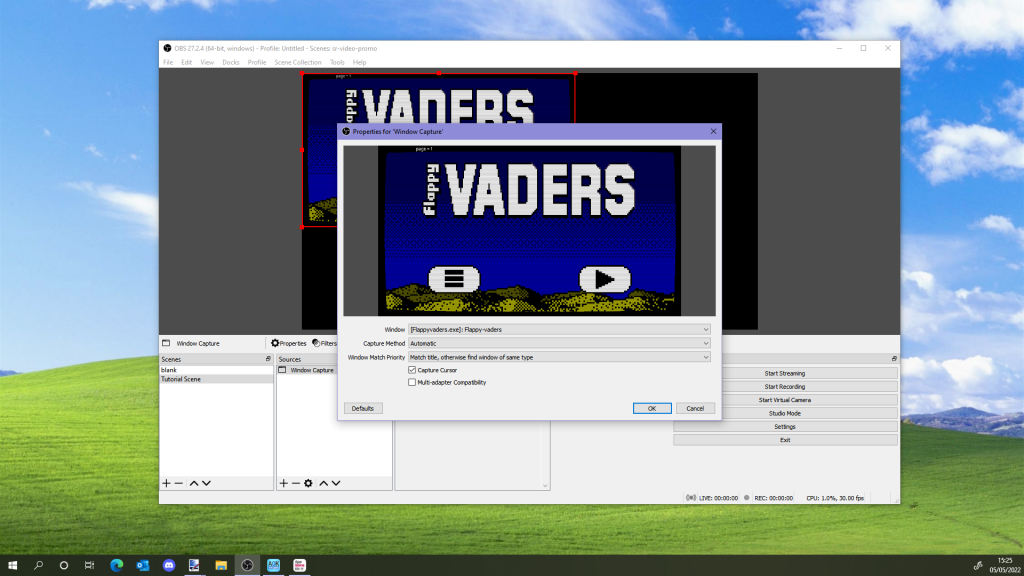
The next dialogue lets you choose which window you are capturing from, as well settings such as whether or not you want the mouse pointer recorded.
I left everything as it was and pressed ok.
You can return to this dialogue by right clicking on the name of the source in the sources panel, and then selecting properties from the menu which appears.
The next job was to stretch the video so that it takes up the entire space available. This was a simple case of dragging the bottom right corner handle of the video.
Add an audio source
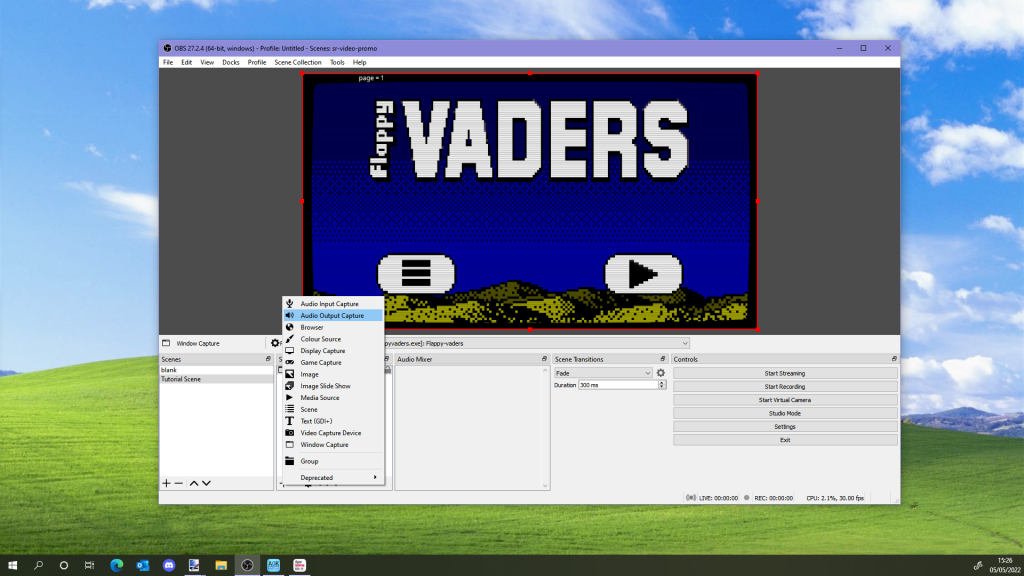
Once again press the + icon in the Sources panel, and this time select Audio Output Capture from the menu.
Give it a name in the next dialogue box. I somewhat unimaginatively called in Audio Output Capture.
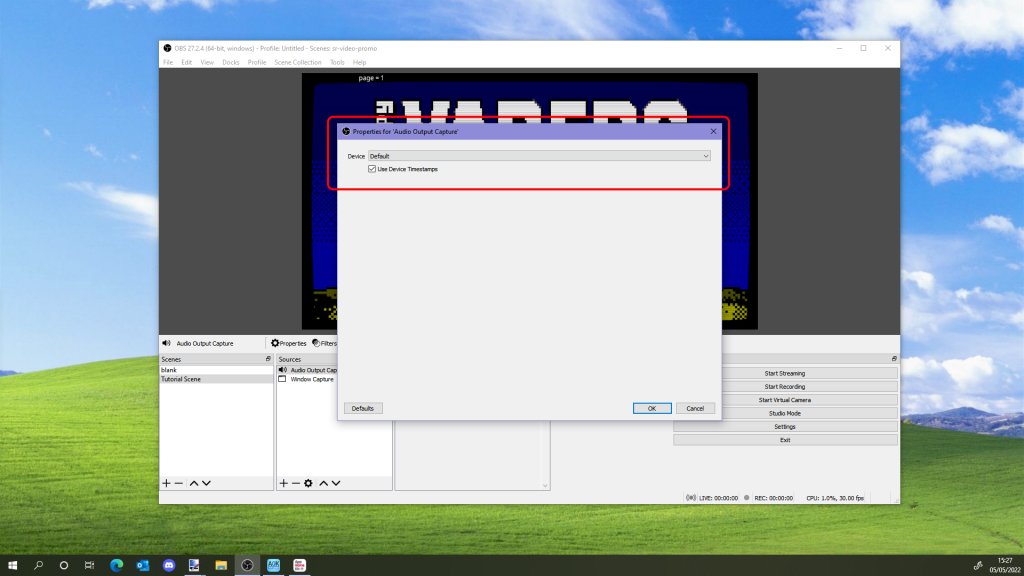
The next dialogue allows you to select which audio device you want to use. I left this on default as it was fine for this tutorial, then pressed ok to move on.
Record video from your game

Now that OBS is configured to record your game, it’s time to run your game, hit the Start recording button, and record some game footage!
OBS will keep recording until you press the Stop recording button, which replaces the Start recording button. When it has stopped, it saves the video to the format and location specified in the settings dialogue, which is located by pressing File -> Settings.
Hints on recording better gameplay
- Record a few seconds of footage before interacting with your game, this makes it easier to cut or mix your video.
- Hide the mouse pointer unless it is really important to your game.
- Record much more video than you need, and edit it to be more interesting or better demonstrate your game afterwards.
Conclusion
I hope by now you have a better idea on how to record video of your game using your computer. If you have any further questions about this then feel free to ask in the forum, or even just drop me an email or instant message.
The next thing I can recommend would be to download a Video editing program such as DaVinci Resolve or Hitfilm Express, which allows you to edit the videos you recorded with OBS and add post production effects and voice overs etc.