Game Progress Update #11

Update #11

Hello world! And welcome to the eleventh Dev with Dave Game Progress Update! It’s nice to say that I (think) I have done everything I said I would do at the end of the last update! It’s a good feeling 🙂 lol
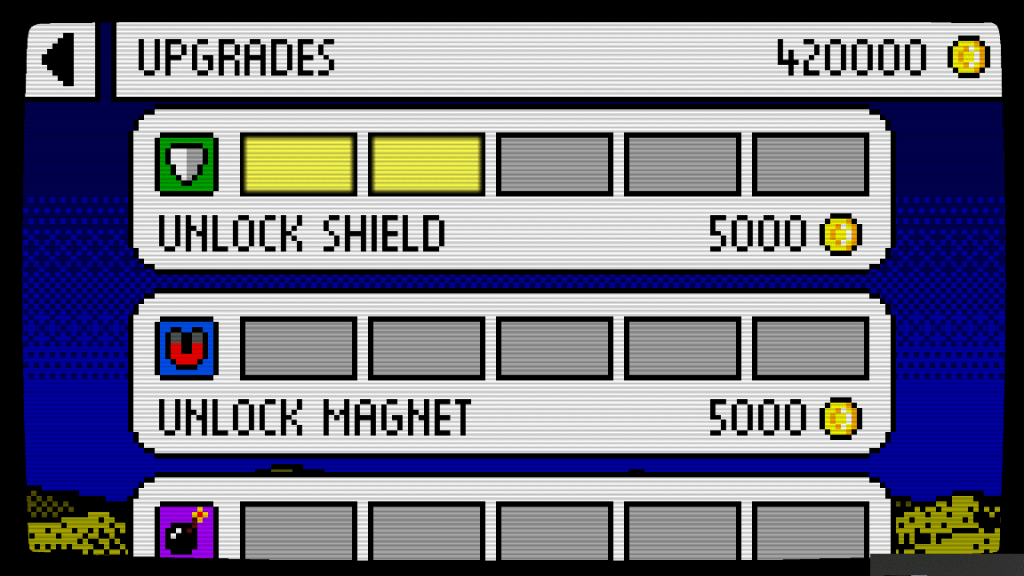
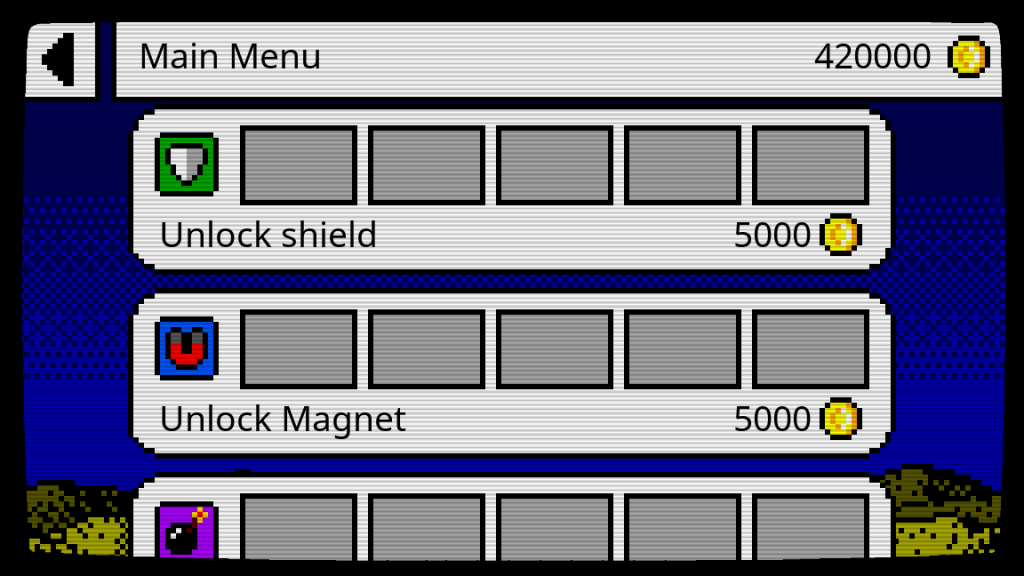
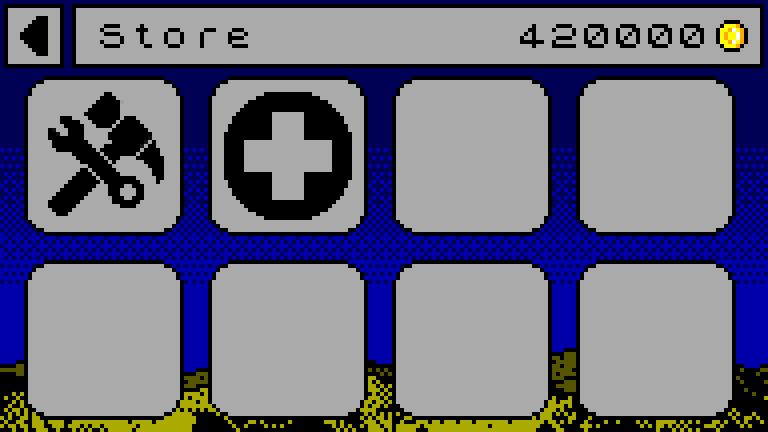
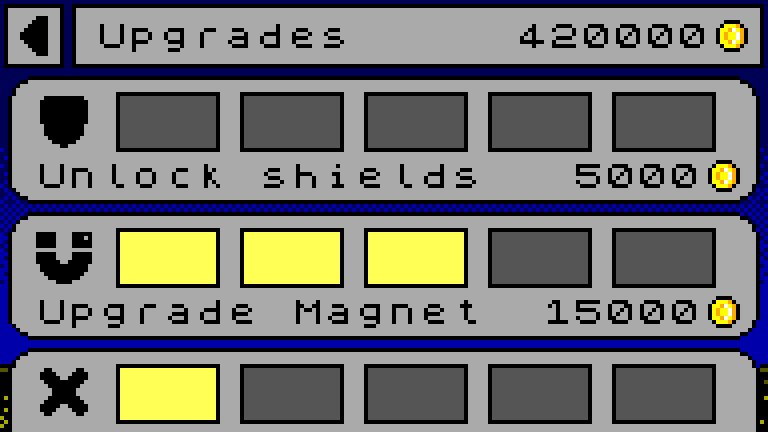
Upgrades store

I managed to fix the problem of accidental purchases when scrolling the upgrade store. After trying many things, over a much longer period than I’d have hoped, I finally settled on recording the buttons position on release and comparing it to the buttons position when pressed initially. If these are the same (plus or minus 1% for accidental movement) then it’s a press, otherwise just ignore it. This was the best performing solution I tried.

Purchasing an upgrade now deducts the price of the upgrade from the players coin total, as well as changing the text and price of the next upgrade.
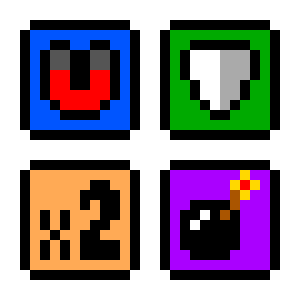
Powerups

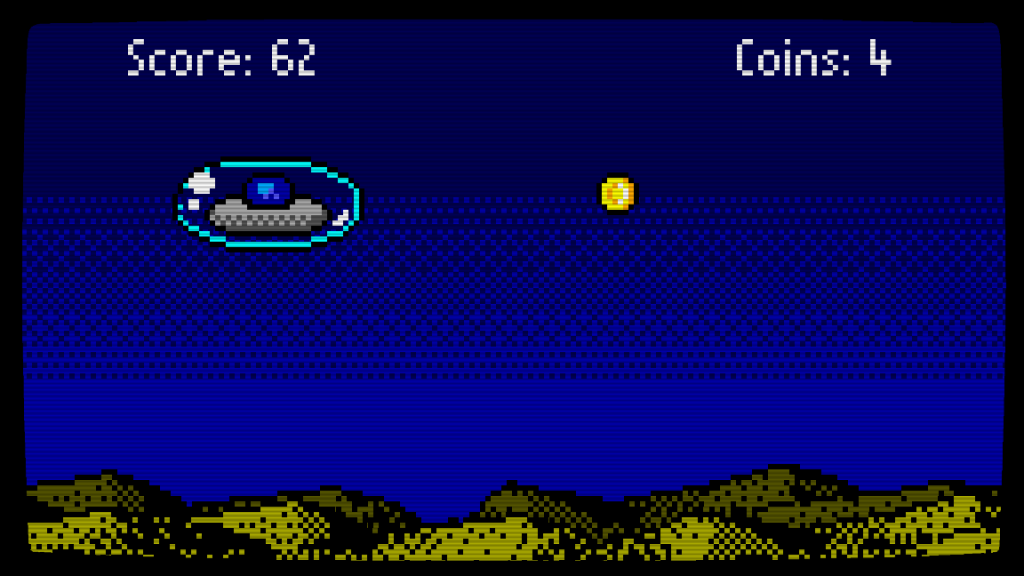
Once a power up is unlocked in the Upgrades store, it can now spawn in the game. Only the shield power up currently does anything, but they are all now unlockable.

The powerups spawn at a rate of 1 every 15 seconds or so, which is more for testing than anything else. I expect in the finished game the initial spawn rate will be much higher.

Once the player pickups up a shield powerup, the game sets a few variables to indicate the shield is active, the start time, and the duration (Which is extended the further upgraded the shield is)

If the shield isActive flag is true, then the collision system simply ignores any zone objects which would otherwise cause the player to crash.

The shield sprite is also toggled to visible when the powerup is activated. This remains until the duration has passed, where upon the isActive flag is set back to false, and the shield sprite is once again hidden.

Next time

The next Dev with Dave progress update is going to be later than usual, because it’s Christmas in two weeks! (I know? I can’t believe how quickly the last few months have gone)

The next update will be on the 15th January 2021, which is a week later than expected. I’m going to be taking a break away from the keyboard over the holidays and it’s thrown the calendar off a little.

However, with the next update I hope to have the rest of the powerups working (Well maybe not the magnet? I’m not 100% sure how I’m going to approach this yet, lol), as well as making place in the store for the single use powers.

It still feels there is so much to do before Flappy-vaders is finished, but overall I’m really happy with what I’ve achieved so far, especially considering the limited time, hardware and resources I’ve been using.

I really need to bring the Trello up to date, and there are some revisions which need making to the GDD also. I’m hoping once the Christmas period is over I’ll be able to devote some free time to bringing these things up straight.

See you next time 🎅

Game Progress Update #10

Update #10

Hello world! And welcome to the tenth Dev with Dave Game Progress Update! This week the work has continued with the menus and a few graphical updates.

Menu Graphics Updates

After what felt like an eternity of downloading and trying different 8 bit style pixel fonts I finally found the one I’m using in the picture below (With a little help from @Opkins from the MK:Game Dev discord, who sent me a link to it).

It’s certainly clean and stylish, but I’m a little sad that the zeros don’t have the line through them. This is the single most distinguishing feature for an 8 bit style font in my opinion.

The main Flappy-vaders logo on the title screen has also been updated. The original was too high-resolution and didn’t match the rest of the graphics. The new version fixes this.

I also have spent some time creating icons for the buttons, as shown in the picture above. These represent upgrade purchase, in game currency purchase, view trophies and about/help.

I’m not entirely happy with the icons tbh, but they’ll certainly do until I can get more time to update the graphics.

Upgrades store

The other main area I’ve been working on is the upgrades store section of the menus.

As you can see from the video, the player can now scroll this list by dragging their finger up or down the screen. And also purchase the shield upgrades by tapping on the button.

This is about as far as I managed to get this update due to some problems I’ve been having trying to differentiate between a tap and a drag with the UI system.

Currently if you start a drag by pressing on the buttons, then the purchase is made and the next box lights up to show this. Unfortunately this isn’t desired behaviour, as I do not want a drag to register as a purchase.

Upgrades

I have also spent some time creating a system to maintain the upgrade purchases the player makes. Currently this is just an array to store values in and a couple of functions to load and save the array to disk.

Next time

And thats all for this time round 🙂 In the next update, I hope to have the dragging bug fixed, and the rest of the upgrade purchasing stuff finished.

Once these are done then it’s time to actually implement some of the powerups in the game.

See you next time 🙂

Comment First Coding

Comment first coding

Comment first coding is a technique that I have used for many many years, but only today found out it has an actual name! (I had a jolly good Google before starting writing this post).

I find it especially useful when I am coding in a language which I am not overly familiar with.

The basic premise of Comment first coding, is planning out what you want your code to do using either plain English, pseudo-code or a mixture of both, in comments.

Then going through one comment at a time, actually writing the code proper.

	//db-jointeam.php - POST(team ID), find playerID from username ($_SESSIONS variable)
	//	If playerID = specified Team's ownerID
	//		Add player to teamlobbyplayers
	//		Set isActive to 1
	//	Else
	//		If isActive = 1
	//			Add player to teamlobbyplayers
	//		Else
	//			Error, lobby not active
	//		Endif
	//	Endif

Above is an example of some Comment first coding from a project I am working on which uses PHP to access a MySQL Database which holds the games player and team data.

Conclusion

And that’s pretty much all there is to Comment first coding. Like I said earlier, I find this technique to be extremely helpful generally, but more so when I’m using a language which I’m not overly familiar with.

Game Progress Update #9

Update #9

Hello World, and welcome to the ninth Dev with Dave Game Progress Update. I’ve not managed to get as much done as I’d have liked, but once again, the curse of tiny image resolutions has made creating the graphical assets take a fair bit longer than I was expecting.

The Menu

The first and most obvious change to this update is the inclusion of the menu button in the bottom left hand corner of the screen.

I’ve used a simple ham burger style icon to represent the menu, shown above with the red exclamation mark indicating that there is something to see in one or more of the menus.

Pressing the menu button opens up the main menu screen. There are currently three buttons, but depending on how things look, I may split the upgrades into two sections, which would require a 4th button.

I didn’t have time to finish the icons for these buttons so they have only simple text labels right now. Each one of the buttons opens up a new UI page.

Pressing the Upgrade button takes you to the upgrade page, where the player can unlock and upgrade various powerups,

All of the UI elements on the menus are created using the existing UI systems which I created earlier in the project.

Power Up Icons

I’ve also created icons for the power ups which the player collects. Below are the icons for the Magnet, Shield, Multiplier and Smart-bomb powerups.

I’ve not however managed to implement them properly into the game yet though.

Refactoring the UI Systems

I spent several hours refactoring the UI systems code after I noticed a much better way of organising the variables. It’s not really changed the way the code works, and there are no visible changes to the player.

Next time

In the next update I hope to have the UI looking a lot more complete, and be fairly functional as well. I’d also like to get the power-up collection a little closer to completion as well.

I also have a lot of updating to do on the Trello board and the GDD, I will try and get these done soon and I’ll update you via social media.

See you next time 🙂

Game Progress Update #8

Update #8

Hello world, welcome to the eighth Dev with Dave Game Progress Update. This time I’ve added the pickup system which will enable the player to use the powerups.

Pickups

The pickups allow the use of powerups, like the shield, which are activated for a limited time after collecting a specific pickup.

Currently the pickup spawns 15 seconds after the last one is collected or drifts off the screen. This is not how it will be in the finished game, but it’s perfect for testing purposes 🙂

The vertical movement is currently a simple sin wave, which is controlled by an angle# variable which wraps round once it reaches 360°.

And, like the coins, collecting the pickup was a simple case of modifying the existing collision function.

The Store UI

I’ve spent quite a long time this week away from the keyboard planning the UI/UX of the store.

Unfortunately the store hasn’t made it into the game yet, but here are some artists impressions of what it will look like.

Below is the Main screen from the store. The title bar area at the top contains a back button to return to the main page, the current page title and the players available balance of coins.

The remaining eight buttons represent a different section of the store. I may consider putting the player stats and achievements here, as well as a profile button and perhaps even the settings.

The next image shows the upgrades section. The title bar remains unchanged, except for the page name. The panels below this represent the upgrades you can purchase.

Each panel contains an icon which represents the upgrade, the name of the upgrade, the price and coin icon, and 5 bars which light up to indicate the level of upgrade.

Once a powerup is fully upgraded, the price disappears as no more purchases are available.

Next time

I hope that I’ll have the store UI in place in the game, even if not fully functional. I still have a lot of graphics to design and create to do this though.

See you next time 🙂

Game Progress Update #7

Update #7

Hello world, welcome to the seventh Dev with Dave Game Progress Update. I’m happy to say that I have at least managed to get the button handling system working this time round, even if there is only one button so far!

Buttons

The button handling system is a simple set of functions which can add a button to a UI page in a single command, check for button presses every frame, and also handle the response to each button press.

The system uses variables to track whether the mouse has been pressed, is being held down, or has been released. This will allow the buttons to animate eventually.

The button properties are all stored in an array the same as the other two UI element types I’ve created.

Problems I’ve faced

The biggest issue I have had whilst creating the button handling system, was the fact that the scanlines overlay was interfering with the button sprite detection. Any checks were simply returning the overlay sprite ID instead of the button below it which was the intended target.

I fixed this by simply moving the sprite offscreen which I check for button presses, then move it back before the screen updates. It’s not an elegant fix, but It will do for now.

The second problem is that I have found it very difficult to make recognisable icons using the low resolution that the game is based on.

In the next update

Over the next two weeks I’m going to spend some time creating graphics for the various UI screens, so hopefully lots more buttons and stuff for you to see (even if it’s not entirely working by the time the next update is here)

I also need to add a system to allow pickups to the gameplay, to allow the player to use powerups. Although I doubt this will make it in until the update after the next one.

See you next time 🙂

Game Progress Update #6

Update #6

Hello world, welcome to the sixth Dev with Dave Game Progress Update. This time round I have a whole new zone to show off, as well as having fixed a couple of niggling issues with restarting the game and some work on the UI handling system with the buttons.

Asteroid Zone

The first addition in this update is the new Asteroid Zone (Section 3.3.4. in the GDD). I’m currently using an asteroid asset which I found on Open Game Art, I like the style, but it’s not using the correct colour palette.

Because of the Zone systems I’ve already set up, spawning the asteroids was fairly straight forward. I did however have to make a small modification to the UpdateZones() function. It now checks to see if the current sprite is an asteroid or not, and if it is it adds a y velocity to the movement as well.

I expanded on the zone description a little on the Trello as well, which I need to update on the GDD, but that will probably wait till Monday now.

Game Restart

The changes here are mostly just bug fixes. The particles now no longer remain on screen when the game restarts, most (if not all) game related variables now reset when you restart the game.

The last thing I changed here was adding a function to remove any of the existing zone sprites ready for a new game.

UI Handling System

The one thing currently missing from the UI Handling System is buttons. I’ve added some variables and some empty functions ready for this, and created some place holder graphics which you can see below.

I had a real issue trying to create the settings icon in such a low resolution and sticking to the design principles.

In the next update

Next time I hope to have the buttons working, and have made a start on creating some of the other UI screens.

See you again in two weeks 🙂

Rubber Duck Debugging

Introduction

Rubber Duck Debugging (or simply Rubber Ducking) is one of the most crazy sounding debugging techniques available to programmers.

The premise is simple, when you get stuck with a problem with your code that the usual debugging techniques have failed to solve, then simply grab an inanimate object and explain to it slowly and step by step what your code does.

How does it work?

There are a few reasons why Rubber Ducking works.

Firstly, when you’re explaining your code to your duck, your are forcing your brain to think about the code much more slowly than when you are simply skimming over the code and thinking about it in your head. This in turn allows your brain more time to consider exactly what is happening in the code.

Secondly, explaining to your Duck switches your focus from an observer of the code, to that of a Teacher. This change of mindset causes you to evaluate your code from a different perspective, which can in turn help with finding and fixing bugs.

It might sound silly (and you’ll probably feel quite silly when you first start talking to a rubber duck), but you would be surprised how well this technique actually works. Especially for logic problems which aren’t easy to spot when simply checking variables in the debug console.

Why a rubber duck?

The name Rubber Duck Debugging comes from a story in the book “The Pragmatic Programmer” by David Thomas and Andrew Hunt, where a programmer would carry around a rubber duck and explain his code to it.

You can of course use anything you like. If you want to explain your code to your mug, then feel free. If you have a favourite cuddly toy then they would be just as happy to listen to you.

Pets can also work, although it’s a little frustrating when they walk off halfway through your explanation.

I’ve even successfully rubber ducked with my girlfriend (who has absolutely no idea about code or computers) whilst taking a relaxing evening walk away from the house and PCs.

Conclusion

I hope you have found this post interesting, and that it gives you another tool to use the next time you’re sat in front of the PC tearing your hair out because you cannot get the code to work.