Game Progress Update #17


Update #17

Hello world! Welcome to the seventeenth Dev with Dave Game Progress Update!

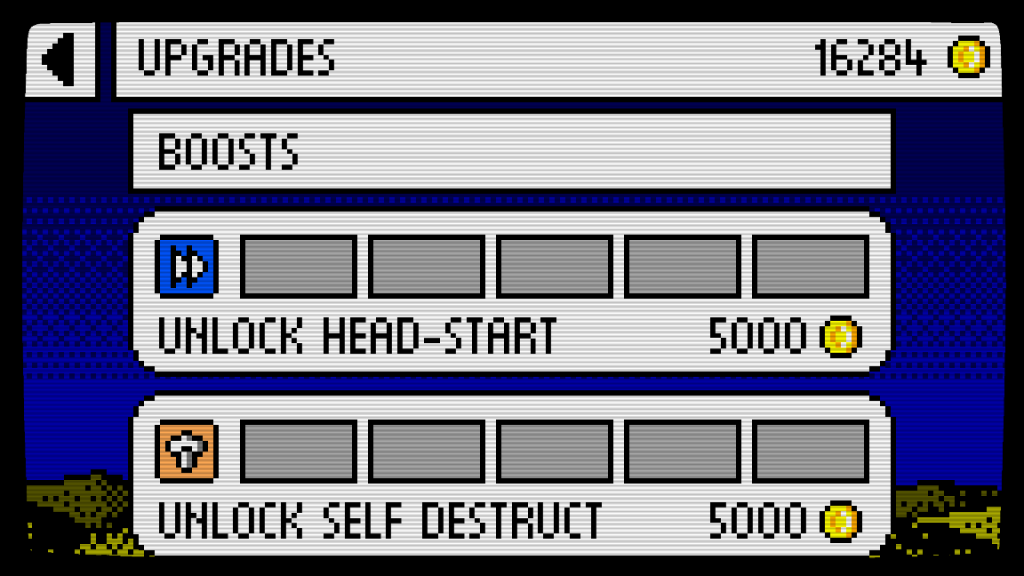
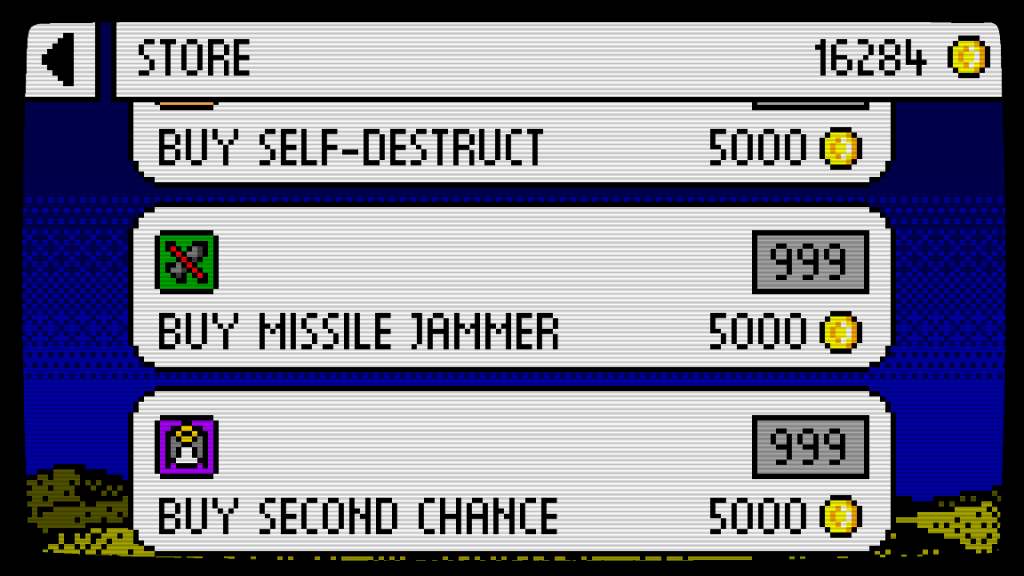
I’ve managed to finish both of the remaining boosts! Now both the Second Chance and the Missile Jammer boosts will work, once the player has unlocked the boost and purchased one.

I’ve also managed to add several new bugs to the Known bugs/Issues list on the Trello board, which is less cool tbh, but better to find them now and fix them in the next revision.
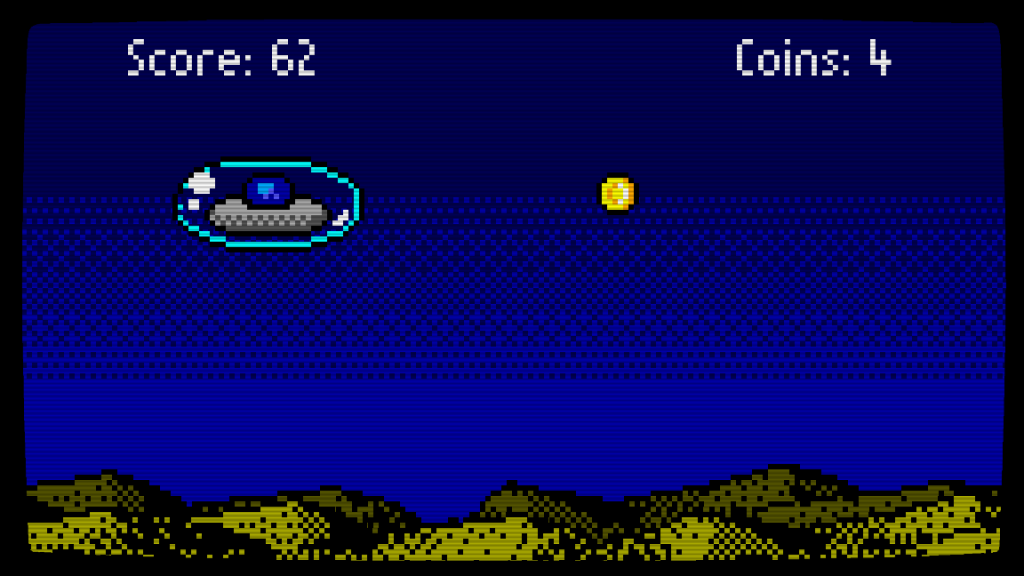
Second Chance boost

The second chance boost causes the player to recover from an impact which would otherwise have killed them. It also provides a few seconds of shield to ensure the player manages to get out of harms way.

This was implemented by adding a few lines of code into the player collision function, which simply checked to see if the player had a Second chance in their inventory, then decreases the inventory count, checks the chances of it working (It starts off a 20%, and increases as the player upgrades the boost), and if successful it simply starts a shield for a few seconds and carries of with the game.

I had to refactor the code which started the particle explosion. I turned it into a function so I could call it from a couple of places where it was necessary, but not when the second chance was in use.

I think the Second chance boost needs some more visual (and audio) feedback. I’d like to see maybe a simple line of text and maybe an angel wings animation appear and disappear on screen.

Missile Jammer boost

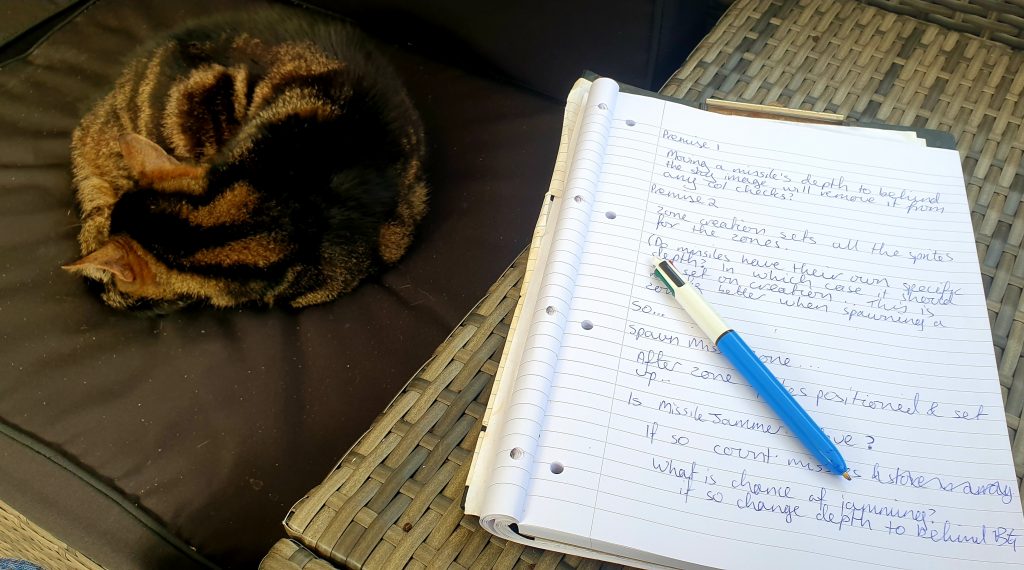
The first thing I did, was plan out exactly how the missile jammer was going to work. Since it was another lovely day I decided to sit outside with a pen and paper (my absolute favourite medium for planning/sketching ideas) and think about exactly how this boost would work.

I added a check at the start of the game to see if the player has any missile jammers in their inventory. If they have then reduce the inventory by one and set the missile jammer isActive flag to true. I’ve done this so the Jammer works for the whole game, rather than needing a new one each missile zone.

Next, I added some code to the spawn zone function which when a missile zone is being spawned, it adds the missile sprite IDs to an array. When the zone has finished spawning, the function quickly cycles through this array and using a similar chance check as the Second Chance boost, it determines whether or not to move the missile.

Initially I thought that I could simply change the depth of the missile sprite so it appeared behind the sky background image, but this didn’t work. Instead I simply moved the jammed missiles offscreen on the y axis.

I imagine this boost would play a sound effect similar to a radio being tuned in when a jammed missile appears on screen (or when it passes the boundary which starts it moving?)

Bugs

I’ve also managed to build up a somewhat large list of bugs. These have all been recorded in the Flappy-vaders Trello board ready for when I’ve finished adding all the basics, and am ready to start polishing and fixing bugs.

I don’t think any of them are particularly game breaking so I am ok with just leaving them as they are while I work on adding the rest of the systems for the game.

Next time

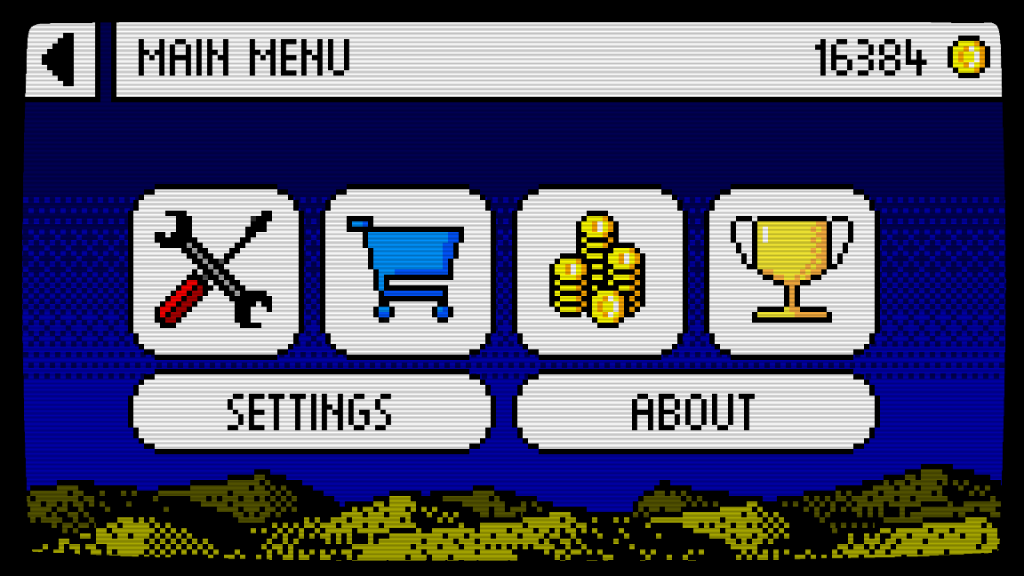
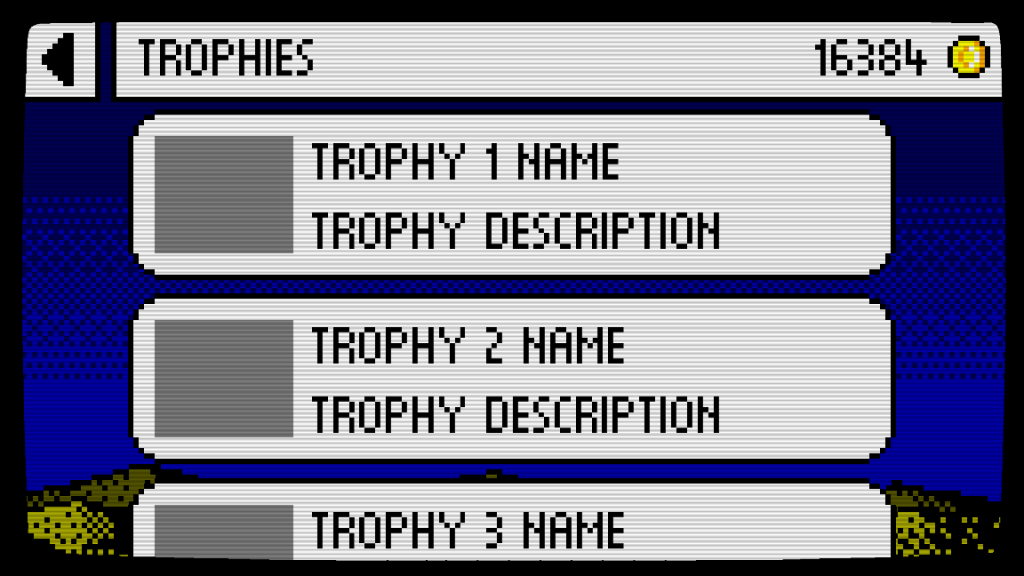
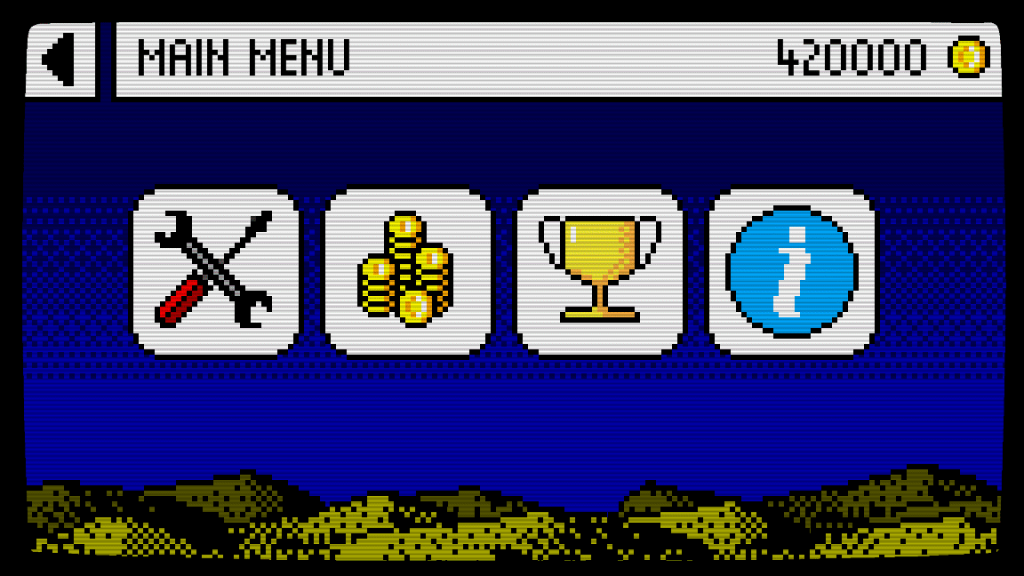
Quite a lot of the remaining things in the “Things to do” list seem to be relating to the User Interface, things like the options screen, pause menu, about screen etc. The rest are mostly relating to monetisation and the sound effects.

I think for the next update I will try and get the UI pages complete and working, which perhaps won’t make for an exciting video next fortnight, but it’s an important part of the game which needs doing.

In the mean time, don’t forget to like, follow and subscribe to Dev with Dave on social media to keep up to date with the project, and I’ll see you in two weeks for another Game Program Update πŸ™‚

Game Progress Update #16


Update #16

Hello world, and welcome to the sixteenth Dev with Dave Game Progress Update!

Since the last update, I have been busy working on the “Cannons” zone, which has taken an awful lot longer to do than I was expecting due to an annoying bug which turned out to be a huge oversight on my behalf. Still, I beat it in the end, and I’m quite pleased with the way the Cannons Zone worked out.

Planning

Again, the entry for the Cannons Zone in the GDD was a little sparse.

3.3.3 Cannons
Obstacles and ground cannons which fire upwards

Flappy-vaders GDD

So, before I could do any coding, I had to sit down and have a real think about what I wanted for the cannons.

Although the original design document said that the guns were to fire upwards, I decided that it would be better for the guns to shoot diagonally.

The guns are to have a muzzle flash image which is displayed when they fire a round.

The cannons and their bullets are also destroyed when in range of a Smart bomb exploding.

I shall update the GDD to reflect these changes as soon as possible.

Media Assets

The first thing I needed before I could start work on the new zone were the graphical assets.

Now I did have some pencil sketches as concept art, as well as the image below, which was a mockup of the game screen I created nearer the start of the project.

So, grabbing my trusty tablet, my new mouse and a fresh cup of tea, I went and sat outside in the sunshine for probably the first time this year and got to work.

I started by using google to search for “Gun turrets” and “futuristic gun turrets” to give me some actual reference images to help with designing the cannon sprites for the zone.

The image above shows the evolution of the turret as I improved and tweaked each iteration of the design until I was happy with it. It took most of the afternoon of playing around inside Paint .Net to achieve this result.

I also created images for the bullet sprites and the cannons muzzle flash.

The Cannon Zone

The cannons are designed to sit on top of the large blue pipes, so I duplicated one of the pipe zones from earlier, and positioned the gun sprites on the top of the piped.

The movement of the cannon sprites is handled by the UpdateZones() function, which also handles firing the gun when the time is right, and spawning the muzzle flash as well.

Bullets

The bullets are held in a pool until the SpawnBullet() function is called. Then a bullet is positioned in the right place relative to the gun that fires it and the inUse property is set to true.

There is an UpdateBullets() function which handles the movement of the active bullets, and collisions are handled by the CheckPlayerCollision() function.

Muzzle flash

I thought this would make a nice touch, It’s a simple sprite which is displayed over the top of the end of the gun barrel for 0.2 seconds while the gun fires.

Again, the movement is handled by the existing code which moves all the zone sprites, and they use a timer to determine when they should vanish.

Bugs!

Now I had huge problems getting the bullets and the muzzle flash to appear in the right place. It turns out I had made a mistake, thinking that the guns[] array ID directly related to the zoneSprites[] array ID; which isn’t the case.

It took literally hours of checking through all the code before I found out what the problem was, and another hour to decide on a solution and code it.

The guns[] array stores data like the last timer fired time, the muzzle flash spriteID, etc. of the gun. Whereas the zoneSprites[] array stores the spriteID of the zone sprites (not just the guns, but the pipes they sit on, and any other elements used)

So, you can see the problem, the ZoneSprites[] array stored gunSpriteID, pipeSpriteID,gunSpriteID, pipeSpriteID,gunSpriteID, pipeSpriteID, etc.

I fixed it by adding the ZoneSpriteID to the guns array[] so I had some way of identifying which zoneSprite the gun data was attached to, and some functions to allow the game to check or assign this.

The second bug is less of a show stopper, but for some reasons the bullets move at slightly the wrong speed in the x axis.

This issue is shown in the image above, where the blue diagonal line is the expected trajectory of the bullet, compared to the actual position of the bullet.

This second bug has been added to the Known Bugs/Issues board on the Trello, and will be fixed when I next work through the list of bugs.

Next Time!

That’s all for this update. Now that I have finished all the zones, I will concentrate on getting the last few powerups/boosts working.

I’ll be back in another fortnight with yet another exciting game progress update! See you then πŸ™‚

Game Progress Update #15


Update #15

Hello world! Welcome to the 15th Dev with Dave Game Progress Update.

In this update I’m happy to say that I’ve got the Missile Zones doneΒ πŸ™‚ It still has some rough edges, but these will be taken care of as part of the game balancing/level design phase.

The missiles themselves were simple additions to the existing systems, but I did have to make a couple of changes to things to get some of the associated effects to work properly.

Since the Missile Zone has been the only thing in this update, I thought it might be invaluable if I went a little more depth into how I created the zone.

Planning

This is how I described the missiles zone in the GDD.

3.3.5 Missiles

Missiles which fly from right to left, possibly using a laser targeting system to warn the player where the missiles will be flying (Like in Jet Pack Joyride, or Sky Force)

Flappy Vaders GDD

It’s not a terrible amount to go on, so I thought I would take you through my process of how I went from the sentence above to the functioning missiles zone in the game.

Since I had referenced both Jetpack Joyride and Sky Force in the GDD, my first port of call was to Google Images so I could remind myself how the missiles looked and worked in these games, and to get some reference images to help with designing the missile and missile effects sprites.

The above image is from Skyforce Reloaded. It uses guidance lasers to show the player the path of the missile and to give them a second or two to move out of the way. The missiles are red and white, and look well, basically just how you would imagine a missile to look.

In Jetpack Joyride, the missiles attack is again forwarned, but this time it uses floating exclamation marks to indicate where the missiles are coming from. This missiles also look strikingly similar to the missiles in the previous game.

So with this in mind, I set to work in Paint .net with a screen grab from Flappy vaders to mock up how I imagined the missile zones to work.

I used Hitfilm Express to create the below video to demonstrate how I imagined the effects would appear in game.


I dropped the warning markers in the end, in preference of the alert flash and the guidance lasers.

I also intend on adding flame/smoke animation to the back of the missiles, but I’ve not got that done just yet.

Once I had an idea of what I was hoping to achieve, as well as all the assets I’d need, then it was time to open AGK Studio and dive into the code.

Red alert flash effect

The first and most obvious addition with this type of zone is the red alert warning flash. This is triggered at the zone start and remains active until the beginning of the next zone.

It’s another full screen sprite placed over the screen, and the flashing is being done using the sprites alpha channel.

It’s handled in a similar way to the Smart bomb effect, with the addition of a direction variable. So when the sprites alpha value reaches zero, instead of the effect ending, the direction variable is toggled and the alpha value is increased instead.

Missiles

The missiles were the simplest part to implement. They are handled exactly the same as the other zoneSprites, but have additional movement code in the same way that the asteroids do.

Unlike the asteroids, the missiles don’t start moving independently until they are close to appearing on screen.

Guidance lasers

The guidance lasers appear just before the missile sprite is due to appear on screen, and disappear again once the missile has left the screen.

I had to change the way the zoneSprite depths work slightly in order to make the guidance lasers appear over the top of the rest of the zoneSprites, but underneath the missiles themselves.

Next time

And that’s all for this update. I’m hoping in the next one to have the Missile jammer boost working, as well as maybe the last zone and boost as well.

Don’t forget to follow @DevwithDave on social media to keep up to date with the project, and with any luck I’ll see you all next time πŸ™‚

Dave

Game Progress Update #14

Update #14

Hello world! Well, here we are at the 14th Dev with Dave Game Progress Update.

I know last update I said I had written enough of the UI systems to complete the powerups and boosts, but I had completely overlooked the fact that I hadn’t yet created the Missiles zone, so creating the missile jammer boost effect was unfortunately not possible.

I did however get the Head start and Self destruct boosts working, although neither is as polished as I’d like them to be.

The unlocking boosts works the same way as the unlocking the other powerups, but I had to write some extra code to handle the purchasing of boosts, managing the stock level and updating the text on the Boost store page buttons.

Head Start

The Head Start boost gives the player an initial burst of speed and a shield to protect them for a few seconds.

Code wise, the pre-game section checks to see if the player has a head start boost, and sets the headstart.isActive flag to true.

The main game section checks this flag, and if it’s true then it initialises a head start by setting the variables for the speed# etc. The game then runs at the boosted speed until the duration is up where it slows back down to the normal speed and the shield ends.

It has shown a bug in the way the score is incremented though. The score is supposed to increase faster when the boost is active due to the increased speed of travel. I’ve added this to the Trello and will look into it next time I’m fixing bugs.

Self Destruct

The self destruct boost gives the player an extra burst of speed at the end of a game by exploding and propelling the ship back up into the air.

The force of the explosion and the number of times the players ship bounces is determined by how upgraded the boost is.

Again, implementing the functionality of this boost was a fairly simple case of adding to the existing systems.

I added a check to the PlayerCollision() function to see if the player had a self destruct in stock when they crashed, and if so then move to the self destruct section instead of the usual game over section.

The new self destruct section initialises the self destruct by giving the player a massive boost of yVelocity# which is directly related to the level the self destruct boost is upgraded to.

It uses the same gravity calculation as the other game sections, but instead of triggering the game over when the player hits the floor, it gives the player another boost of yVelocity# as long as the maximum number of bounces hasn’t been exceeded.

The maximum number of bounces is also dependant on the level of the upgrade. Higher levels give more bounces, and therefore more distance and more score.

This will probably have an explosion sound effect, as well as a similar flash effect to the Smart bomb power up, and possibly some extra particle effects as well.

Next time

And that’s that. I’m still kicking myself that I’d forgotten I hadn’t written the missile zone handling system. I also have one other game zone system to write before I have finished all the planned zones and can move on to a bit of level design, creating some more zone sub sets to make the game less repetitive.

On the next update I hope to have not only added the system to handle missile zones to the game, but also have completed the last two boosts!

As always don’t forget to follow @devwithdave on social media if you haven’t already, and I’ll be back in another fortnight with the next exciting game progress update!

See you then

Dave.

Game Progress Update #13

Update #13

Hello world! Welcome to the thirteenth Dev with Dave Game Progress Update. Since the last update I have managed to get three more of the powerups working, those being the magnet, smart bombs and the score multiplier.

Score Multiplier

Implementing the score multiplier was fairly straight forward.

When the player collects the Score Multiplier power up, a flag is set which indicates that the powerup is active.

When the game gets to the “increase score” part, it simply checks this flag and if it’s active then the score is multiplied by the multiplier level x 2. This gives the player the following multiplier options, x2, x4, x6, x8 and x10.

Smart Bombs

The next powerup is the Smart bombs, collecting one of these will destroy any enemy object on screen. It is intended to not work against structures, so it will leave the pipes intact.

When the player collects the smart bomb powerup, the game calls the SmartBomb() function.

This checks through all the sprites being used to display the current zone, and if they are in range and of the correct type then the sprites are disabled and moved off screen.

Because simply making the meteors disappear looked a little boring, I added a blinding white flash of light effect.

This was achieved by positioning a screen sized white sprite over the game sprites but beneath the CRT overlay effect sprites, and then decreasing the alpha value of it.

Simple but effective πŸ™‚

Magnet

The last powerup I’ve done is the Magnet. Once collected this powerup makes coins within range fly towards the players ship.

In a similar way to the smart bomb, to create this powerup the game checks through all the current zone sprites to see if any of them are coins. Although it does it every update until the duration has expired.

If a coin is found in range, then the game calculates the angle the coin needs to move in, which is a simple bit of trigonometry. It then moves the coin towards the player.

I say a “simple bit of trigonometry”, but this is what happened the first time I ran the game after coding the magnet systems.

I’m pretty sure that’s not how physics is supposed to work! πŸ˜‚πŸ˜‚πŸ˜‚

I would like to add a visual effect to this as well, to give the player more indication that this powerup is active. It will probably have an active sound effect as well.

Next time

And that’s all I’ve had chance to do this time round. I’ll try and get the Trello updated this evening to reflect the changes made. In the next update, I’ll endeavour to get the boosts working.

As always, don’t forget to like, follow and subscribe to @devwithdave on social media to keep up to date with the project.

And if you have any questions, feel free to ask them on the >forum<.

See you in another two weeks.

Game Progress Update #12

Update #12

Hello world! Welcome to the twelfth Dev with Dave Game Progress Update. At the end of the last video I said I was going to be working on getting the power ups functional, this needed a little extra work to be done on the UI to allow unlocking the rest of the power ups, as well as purchasing the single use items pre-game. So this update is mostly about changes and additions I’ve made to the UI store pages.

Main menu

I’ve reconsidered the layout of the main menu page, as part of the rethink on how the powerups are going to work.

I have changed the icons in the square buttons, and added an extra two buttons at the bottom for the Settings and About pages.

Upgrades page

I’ve added a section at the bottom of the page to enable the player to unlock and upgrade the boosts, which are single use power ups to use in the next game.

These will work in the same way as the previous items in the upgrades page.

Boosts page

The player can buy the boosts from the next store page. I’ve only created the layout for this page so far, and none of the buttons do anything yet.

The grey box on the right displays how many of the powerup you have.

I’ve not decided as yet how to show that the items on this page haven’t been unlocked, but I imagine it would be something like removing the price/coin icon, or maybe greying out the entire button.

Coins

The next page is the coins page where players can earn coins by watching a rewarded advert, buy coin bundles for real world money, or pay to have the full screen adverts removed between games.

Again nothing in this section is functional yet, and I’m using the grey rectangle as a place holder. Each button in this section will ideally have it’s own icon to replace the grey square.

Trophies

The next page is the trophies page. This page will show which trophies the player has already unlocked, and which trophies still need completing.

Next time

I’m now quite happy that I have enough of the UI done to allow me to write the remaining systems to handle the powerups and boosts. I’ll revisit the UI at a later date and do some more work there.

My goal for the next update is to have all of the powerups and boosts working. I’ve already got one done, which leaves seven to go.

And that’s all for this update, I’ll see you in another two weeks with the next one!

Game Progress Update #11

Update #11

Hello world! And welcome to the eleventh Dev with Dave Game Progress Update! It’s nice to say that I (think) I have done everything I said I would do at the end of the last update! It’s a good feeling πŸ™‚ lol

Upgrades store

I managed to fix the problem of accidental purchases when scrolling the upgrade store. After trying many things, over a much longer period than I’d have hoped, I finally settled on recording the buttons position on release and comparing it to the buttons position when pressed initially. If these are the same (plus or minus 1% for accidental movement) then it’s a press, otherwise just ignore it. This was the best performing solution I tried.

Purchasing an upgrade now deducts the price of the upgrade from the players coin total, as well as changing the text and price of the next upgrade.

Powerups

Once a power up is unlocked in the Upgrades store, it can now spawn in the game. Only the shield power up currently does anything, but they are all now unlockable.

The powerups spawn at a rate of 1 every 15 seconds or so, which is more for testing than anything else. I expect in the finished game the initial spawn rate will be much higher.

Once the player pickups up a shield powerup, the game sets a few variables to indicate the shield is active, the start time, and the duration (Which is extended the further upgraded the shield is)

If the shield isActive flag is true, then the collision system simply ignores any zone objects which would otherwise cause the player to crash.

The shield sprite is also toggled to visible when the powerup is activated. This remains until the duration has passed, where upon the isActive flag is set back to false, and the shield sprite is once again hidden.

Next time

The next Dev with Dave progress update is going to be later than usual, because it’s Christmas in two weeks! (I know? I can’t believe how quickly the last few months have gone)

The next update will be on the 15th January 2021, which is a week later than expected. I’m going to be taking a break away from the keyboard over the holidays and it’s thrown the calendar off a little.

However, with the next update I hope to have the rest of the powerups working (Well maybe not the magnet? I’m not 100% sure how I’m going to approach this yet, lol), as well as making place in the store for the single use powers.

It still feels there is so much to do before Flappy-vaders is finished, but overall I’m really happy with what I’ve achieved so far, especially considering the limited time, hardware and resources I’ve been using.

I really need to bring the Trello up to date, and there are some revisions which need making to the GDD also. I’m hoping once the Christmas period is over I’ll be able to devote some free time to bringing these things up straight.

See you next time πŸŽ…

Game Progress Update #10

Update #10

Hello world! And welcome to the tenth Dev with Dave Game Progress Update! This week the work has continued with the menus and a few graphical updates.

Menu Graphics Updates

After what felt like an eternity of downloading and trying different 8 bit style pixel fonts I finally found the one I’m using in the picture below (With a little help from @Opkins from the MK:Game Dev discord, who sent me a link to it).

It’s certainly clean and stylish, but I’m a little sad that the zeros don’t have the line through them. This is the single most distinguishing feature for an 8 bit style font in my opinion.

The main Flappy-vaders logo on the title screen has also been updated. The original was too high-resolution and didn’t match the rest of the graphics. The new version fixes this.

I also have spent some time creating icons for the buttons, as shown in the picture above. These represent upgrade purchase, in game currency purchase, view trophies and about/help.

I’m not entirely happy with the icons tbh, but they’ll certainly do until I can get more time to update the graphics.

Upgrades store

The other main area I’ve been working on is the upgrades store section of the menus.

As you can see from the video, the player can now scroll this list by dragging their finger up or down the screen. And also purchase the shield upgrades by tapping on the button.

This is about as far as I managed to get this update due to some problems I’ve been having trying to differentiate between a tap and a drag with the UI system.

Currently if you start a drag by pressing on the buttons, then the purchase is made and the next box lights up to show this. Unfortunately this isn’t desired behaviour, as I do not want a drag to register as a purchase.

Upgrades

I have also spent some time creating a system to maintain the upgrade purchases the player makes. Currently this is just an array to store values in and a couple of functions to load and save the array to disk.

Next time

And thats all for this time round πŸ™‚ In the next update, I hope to have the dragging bug fixed, and the rest of the upgrade purchasing stuff finished.

Once these are done then it’s time to actually implement some of the powerups in the game.

See you next time πŸ™‚